Before You Start - Verilog
Why Verilog Matters
Verilog is not just another coding language — it’s a Hardware Description Language (HDL) that drives the entire semiconductor industry. Unlike C or Python, Verilog doesn’t just run on a CPU; it defines actual digital hardware — flip-flops, multiplexers, state machines, processors — that become part of silicon chips.
From the microcontrollers in cars to the processors in smartphones, and from FPGAs in defense systems to ASICs in AI accelerators, Verilog is at the heart of digital design. Mastering it gives you the keys to one of the world’s most advanced industries.
Verilog in the Chip Design Flow
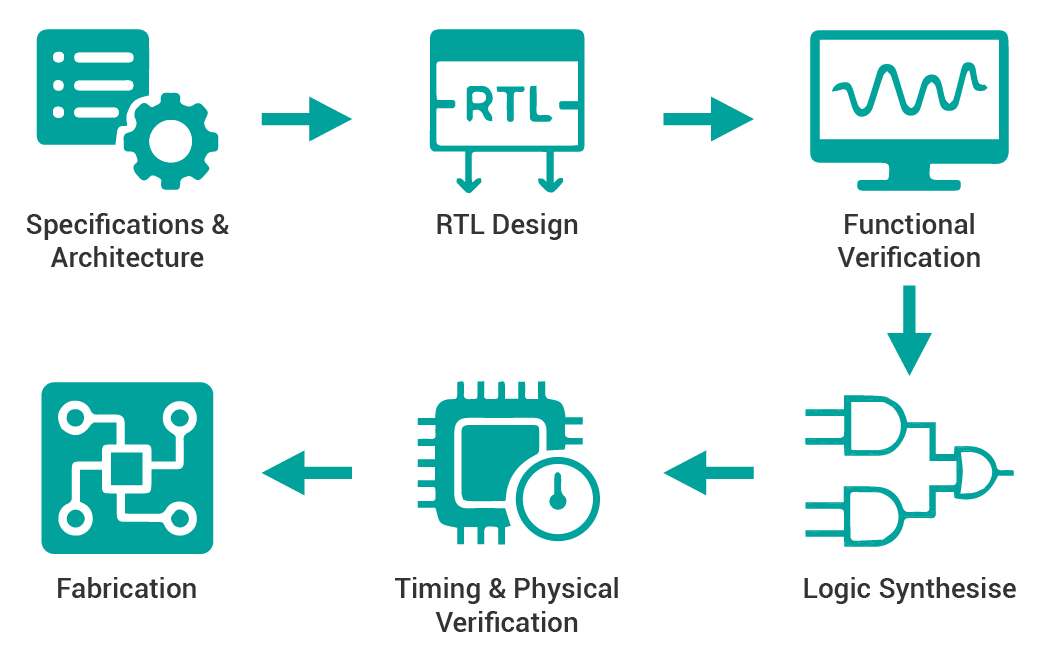
Chip design is a multi-phase process:
- Specifications & Architecture - define chip functionality, performance targets, and system-level structure.
- RTL Design (Register Transfer Level) – writing Verilog to describe the behavior and structure of digital circuits.
- Functional Verification – simulating Verilog to ensure the design behaves correctly.
- Logic Synthesis – converting Verilog into a gate-level netlist.
- Timing & Physical Verification – checking that circuits meet speed and timing requirements.
- Fabrication – manufacturing the verified design into silicon.
Verilog plays a central role in front-end design (RTL), simulation, verification, and even synthesis.
Verilog is one of the most sought-after skills. Recruiters look for engineers who can not only write Verilog but also debug waveforms, model delays, and think in hardware. If you want to enter semiconductor design, verification, or FPGA development, Verilog is your starting point.
Why EWskills?
EWskills provides a complete VLSI practice learning environment, built with top working experts from the semiconductor industry.
Every task, circuit, and concept has been designed with industry professionals to ensure it aligns with real-world RTL design and verification standards.
It is designed to train the early engineers in top companies and give them structured hands-on experience.
Verilog Skill
The VLSI Skill on EWskills introduces you to digital hardware design using Verilog.
You’ll progress from simple gates to complex sequential logic, and from simulation to synthesis — just like a professional RTL engineer.
You’ll learn to think in terms of signals, timing, and real hardware behavior, not just syntax.
Before you begin, it helps to have a basic understanding of digital logic, gates, number systems (binary, hexadecimal, etc.), FSMs, and synchronous circuits — and you can always revisit these concepts as you learn.
Platform Overview
- IEEE Verilog-2005 Standard (IEEE Std 1364-2005)
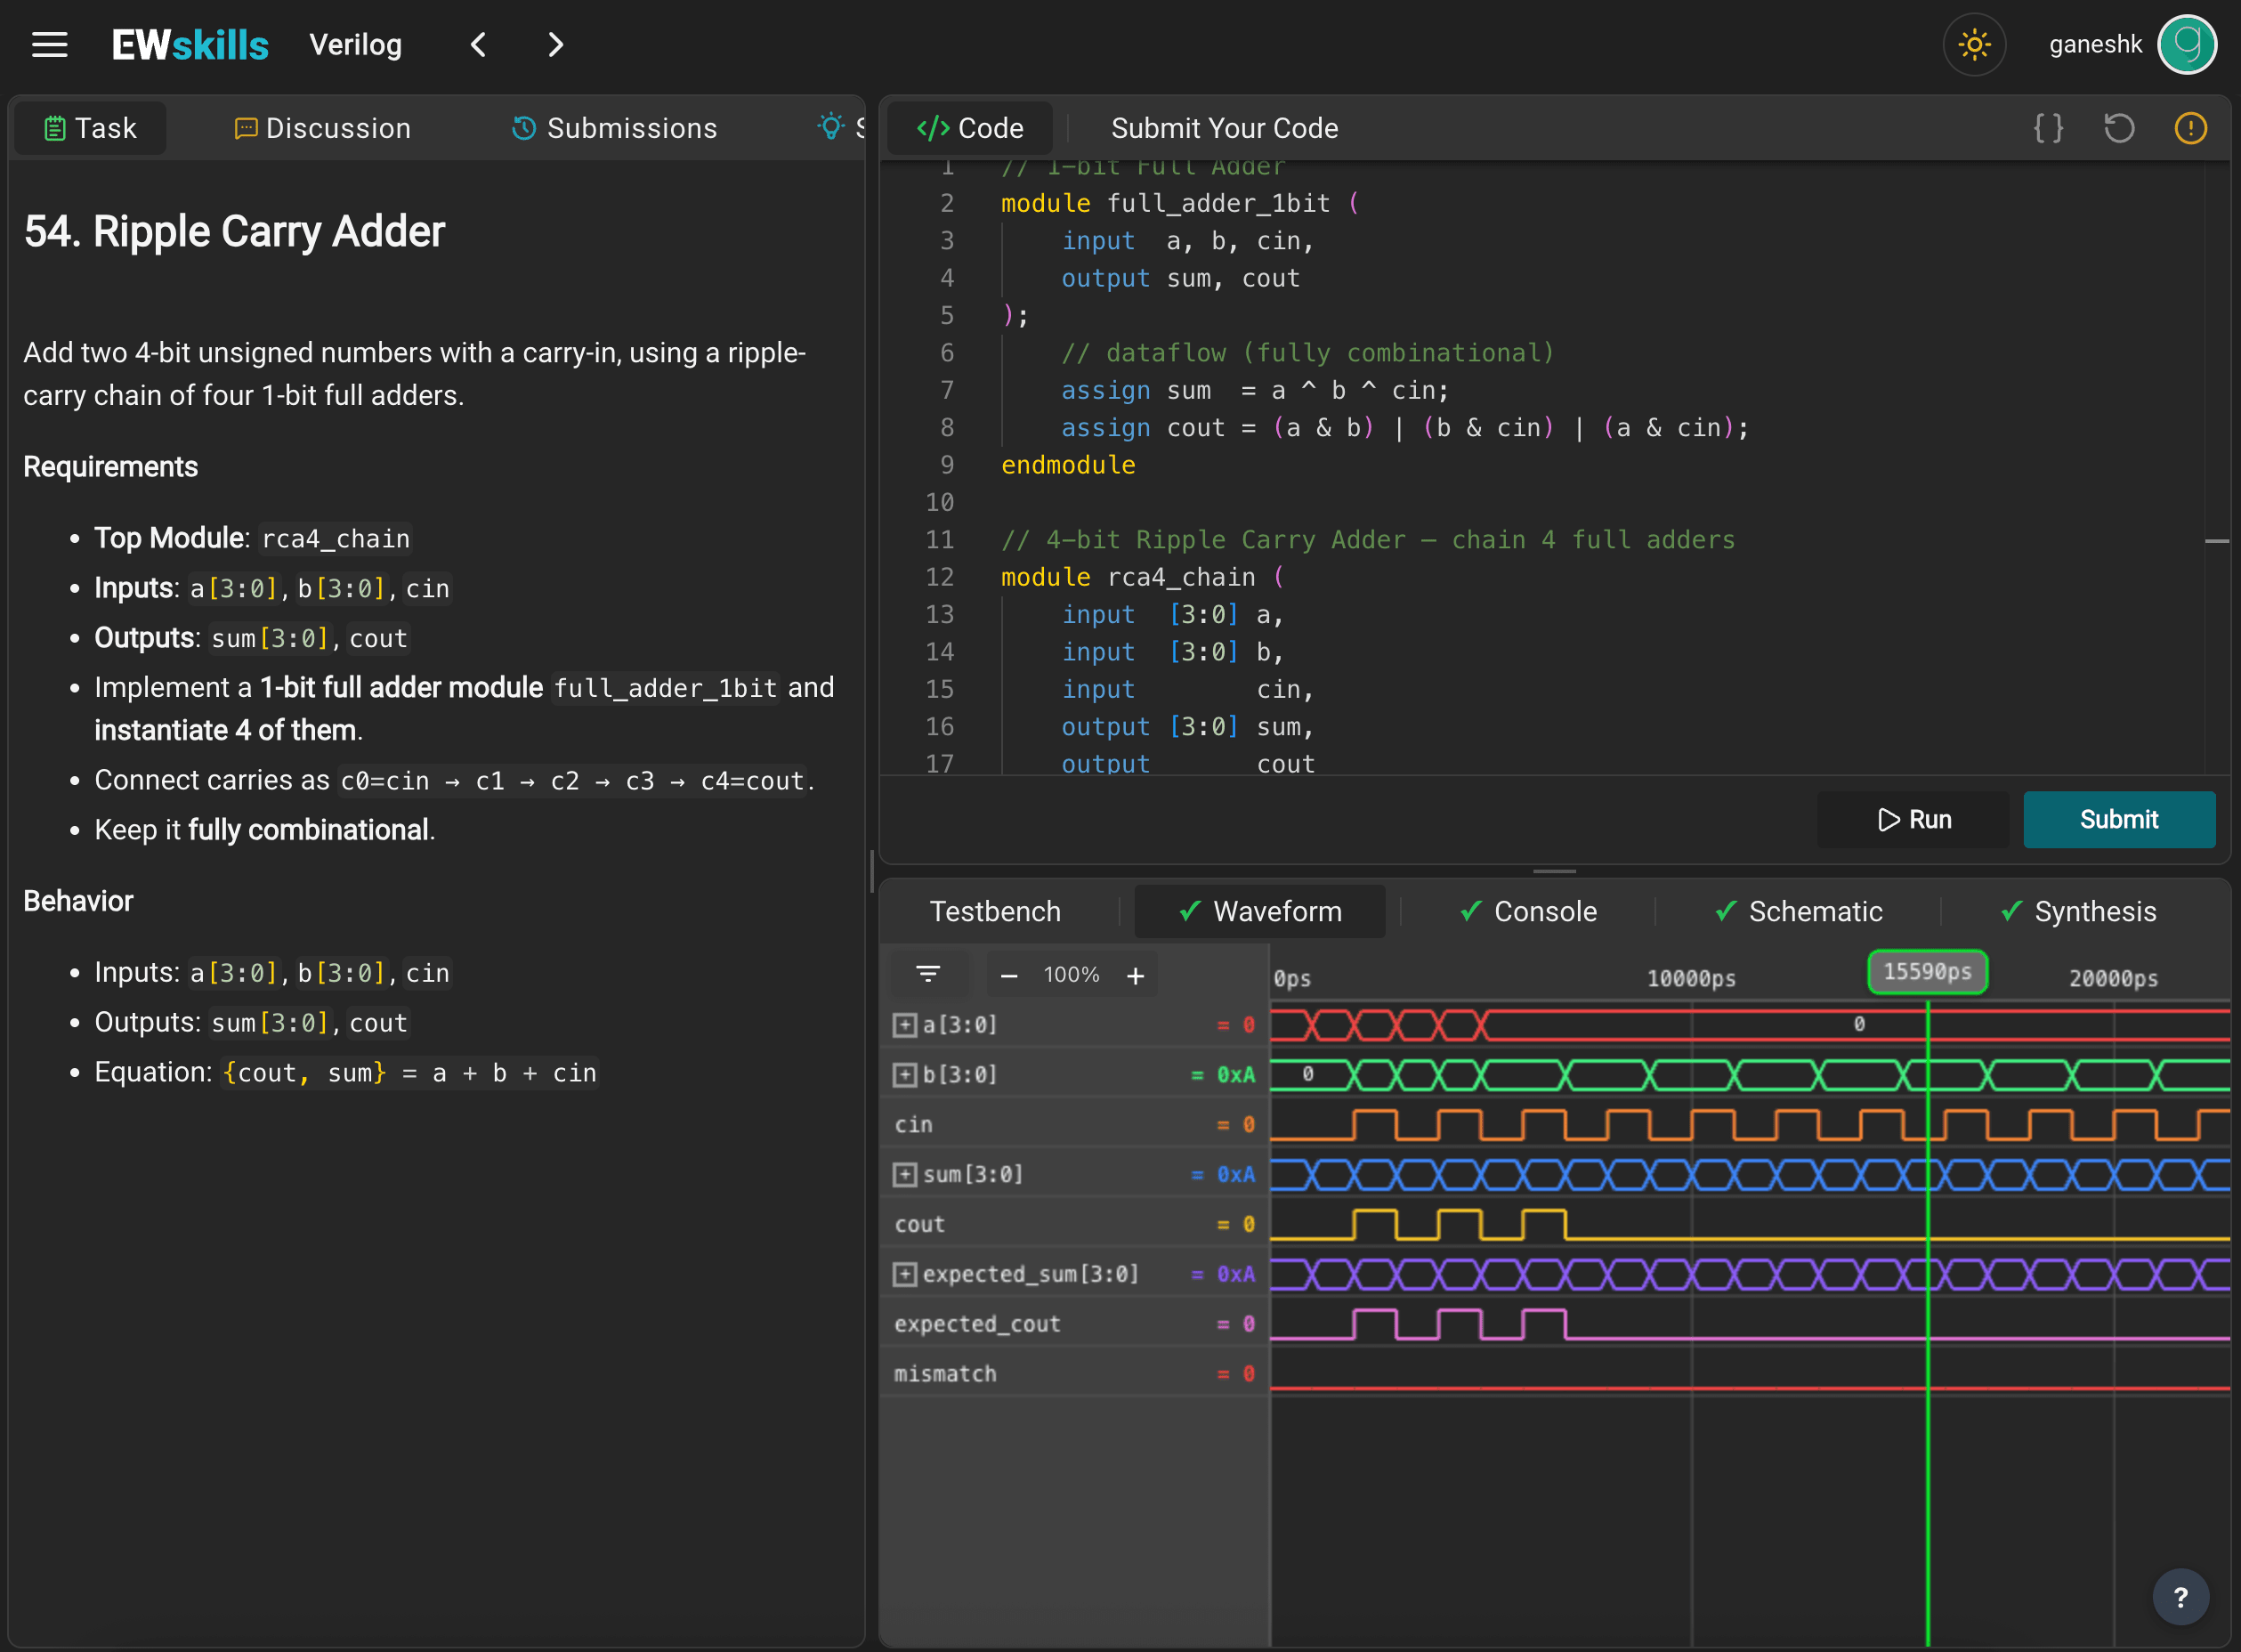
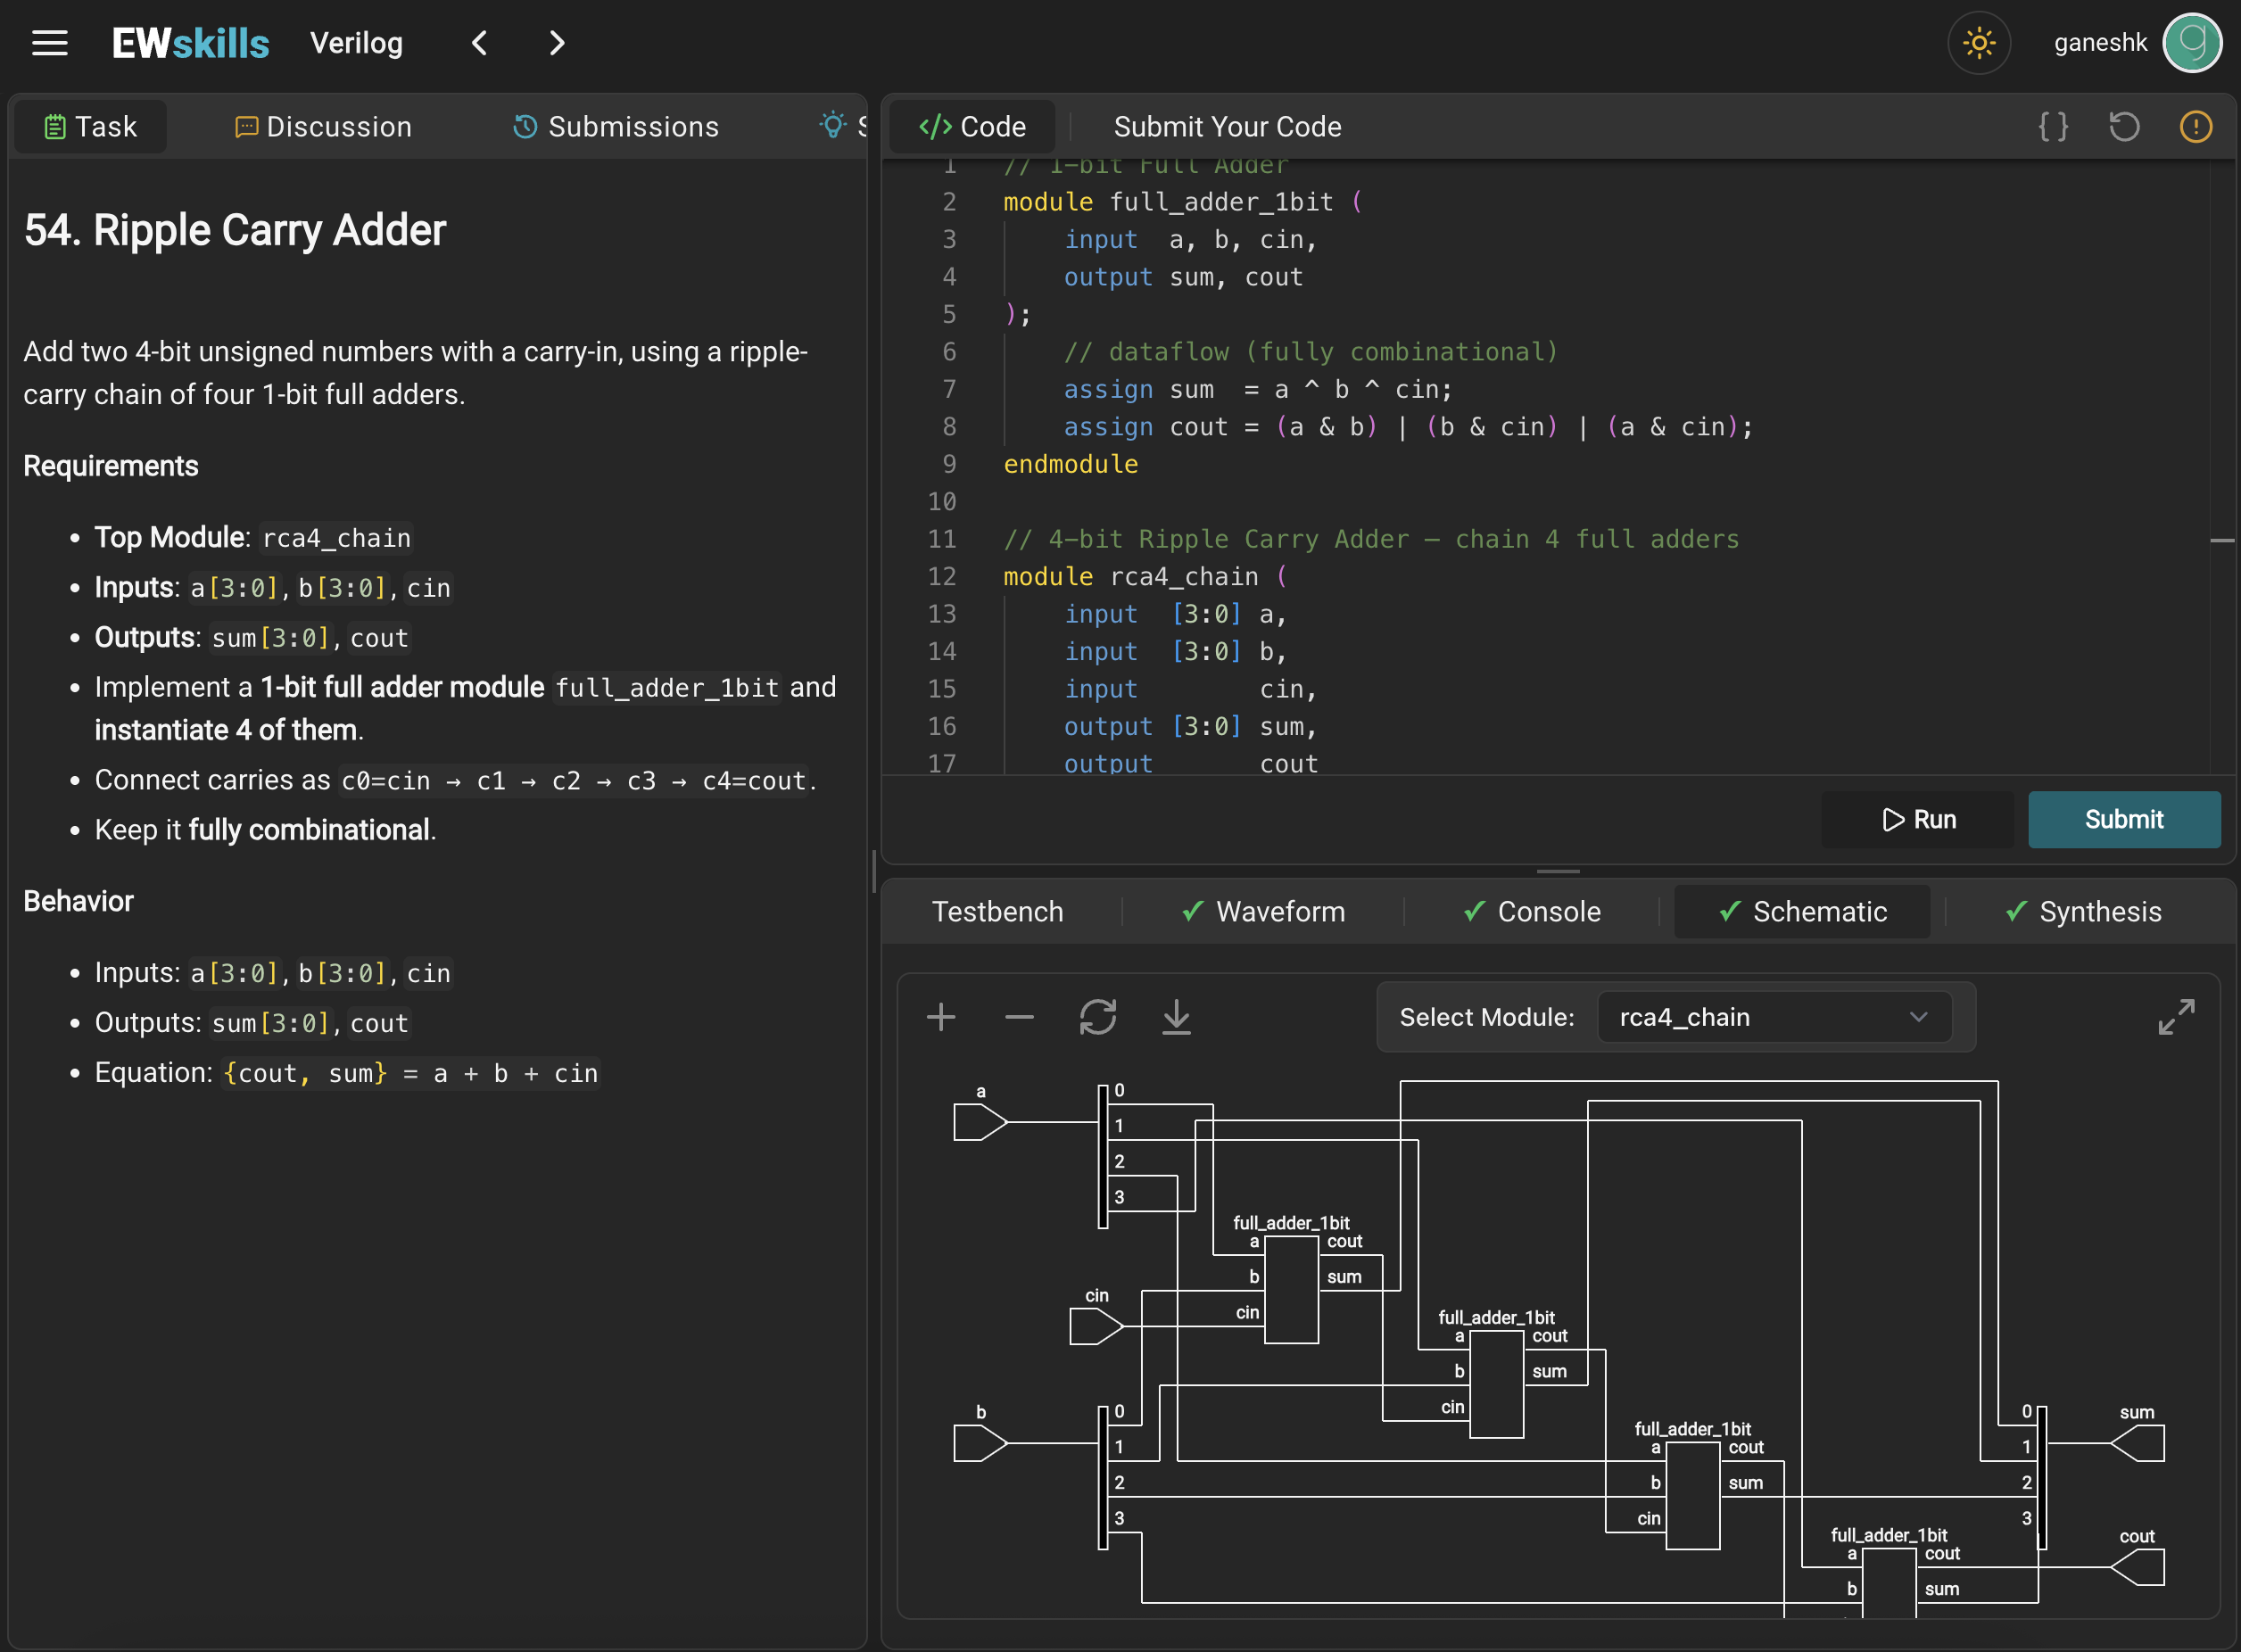
- Integrated IDE-like Experience:
- Code editor with Verilog syntax highlighting
- Compiler & simulation console outputs
- Waveform viewer to analyze signals over time
- Schematic Viewer to see the generated RTL schematic
- Synthesis Report Viewer to see the full synthesis
What You’ll Learn (Skill Roadmap)
Your journey is structured to simulate the real-world RTL design process — step by step:
1. Getting Started & Basics
- Learn wires, data flow, operators, and how Verilog describes hardware.
2. Gates & Combinational Logic
- Implement logic gates, multiplexers, encoders, decoders, and ALUs.
3. Data Types & Procedural Constructs
- Explore parameters, always blocks, signal assignments, and timing logic.
4. Primitives & Operators
- Work with Verilog primitives, operators, and synthesis-safe constructs.
5. Control Flow, Functions, and Tasks
- Build smarter designs using control statements, functions, and reusable tasks.
6. Sequential Logic
- Master latches, flip-flops, and register-level behavior.
7. Advanced Design Blocks
- Create multi-bit registers, shift registers, counters, and simple system logic.
8. Schematic & Synthesis View (New!)
- Visualize your RTL structure and understand how code translates into gates.
Each section mirrors how RTL engineers design chips — block by block, testing and optimizing at every stage.
What You’ll Gain
By completing this skill, you’ll be able to:
- ✅ Write synthesizable Verilog code for combinational and sequential circuits
- ✅ Understand gate-level hardware behavior and signal propagation
- ✅ Interpret synthesis reports and schematic structures
- ✅ Build reusable modules using parameters, functions, and control logic
- ✅ Design components that scale from gates → latches → flip-flops → registers → arithmetic units
You won’t just “learn” Verilog — you’ll design real hardware logic and understand how it’s implemented on silicon.
How to Learn Effectively
To get the best out of this skill:
- Practice daily — aim for at least one task a day; consistency matters more than speed.
- Visualize every circuit — use the Schematic and Waveform tabs to see how your design behaves.
- Read synthesis logs — understand what happens under the hood when your code turns into gates.
- Use Quick Guides — they explain each concept in simple, practical terms.
- Experiment — modify your design, break it, debug it. That’s how real engineers grow.
Remember, VLSI design is not about memorizing syntax — it’s about mastering the thinking process of hardware design.
Who This Skill Is For
- Electronics, Electrical, and Computer Engineers who want to move beyond simulation and into real RTL logic design.
- Aspiring VLSI or FPGA engineers preparing for core job roles in RTL, verification, or physical design.
Common Mistakes and Myths
💭 “Verilog is just coding like C.”
No — it describes hardware behavior, not software execution. Every line can become a real gate.
💭 “Simulation means I’ve designed hardware.”
Simulation is step one — synthesis tells you if your code is hardware-correct.
💭 “I’ll understand it by reading theory.”
You won’t. The only way to learn VLSI is to write, run, break, and fix designs. Every problem here builds a new mental connection.
The Engineer’s Mindset
Stay consistent.
Solve daily.
Visualize your hardware.