Loading...
80. High-Frequency Pulses Counter
Build a system using a microcontroller that counts the number of pulses received, where the maximum pulse frequency is 8 MHz.
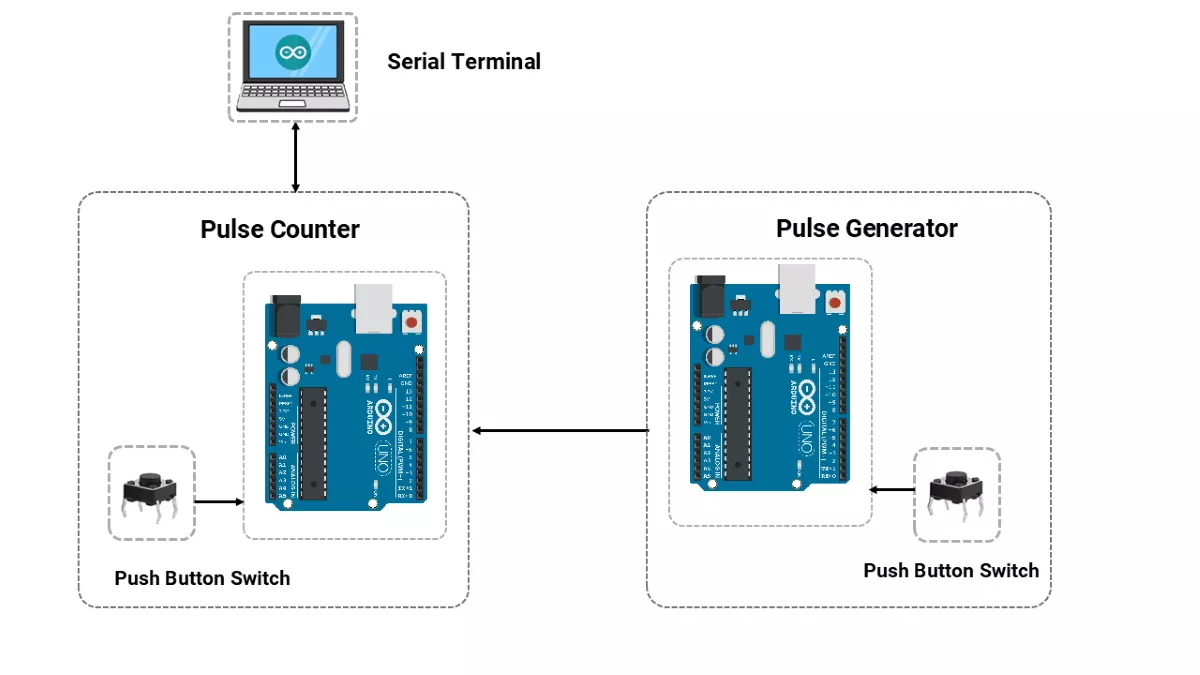
Connect the push button to the microcontroller. After pressing the push button switch, it will display the pulse count on the serial terminal (e.g., PuTTY, Arduino IDE) and then reset the count to 0.
Note: We can use any approach or method to generate pulses.
Example Using Two Arduino UNO:

Pulse Generator Code (using Arduino UNO)
The code below generates 1000 pulses with an approximate pulse width of 125 ns when the push button switch is pressed.
#define SWITCH_PIN 12
#define DEBOUNCE_DELAY 50  // debounce delay

bool last_button_state = 1;            // Previous button state (1: not pressed, 0: pressed)
bool current_button_state = 1;         // Current button state
unsigned long last_debounce_time = 0;  // Timestamp of the last button state change


void setup() {
  Serial.begin(115200);  // Initialize serial communication at 115200 baud rate
  pinMode(7, OUTPUT);    // Set pin 7 as an output pin(pulses are generated on this pin)
  pinMode(SWITCH_PIN, INPUT_PULLUP);
  digitalWrite(7, LOW);
}

void loop() {
  // Generate 1000 pulses after valid button press
  if (is_debounced_press(SWITCH_PIN)) {
    uint32_t i = 0;
    while (i < 1000) {
      PORTD = 0x80;  // Set the 7th bit of PORTD to HIGH (binary 10000000), turning on pin 7
      _NOP();
      PORTD = 0x00;  // Set all bits of PORTD to LOW (binary 00000000), turning off pin 7
      i++;
    }
    Serial.println("Pulse Generated");
  }
}


// check valid button press
bool is_debounced_press(int button_pin) {

  int reading = digitalRead(button_pin);

  // If the button state has changed, reset the debounce timer
  if (reading != last_button_state) {
    last_debounce_time = millis();
  }
  last_button_state = reading;
  // If the button state is stable for more than 50 msec it will  update the state.
  if ((millis() - last_debounce_time) > DEBOUNCE_DELAY) {
    if (reading != current_button_state) {
      current_button_state = reading;
      if (current_button_state == 0) {
        return true;  // valid press detected
      }
    }
  }
  return false;  // No valid press detected
}